Things to Know
In this video, we will show you how to navigate the Clover Dashboard.
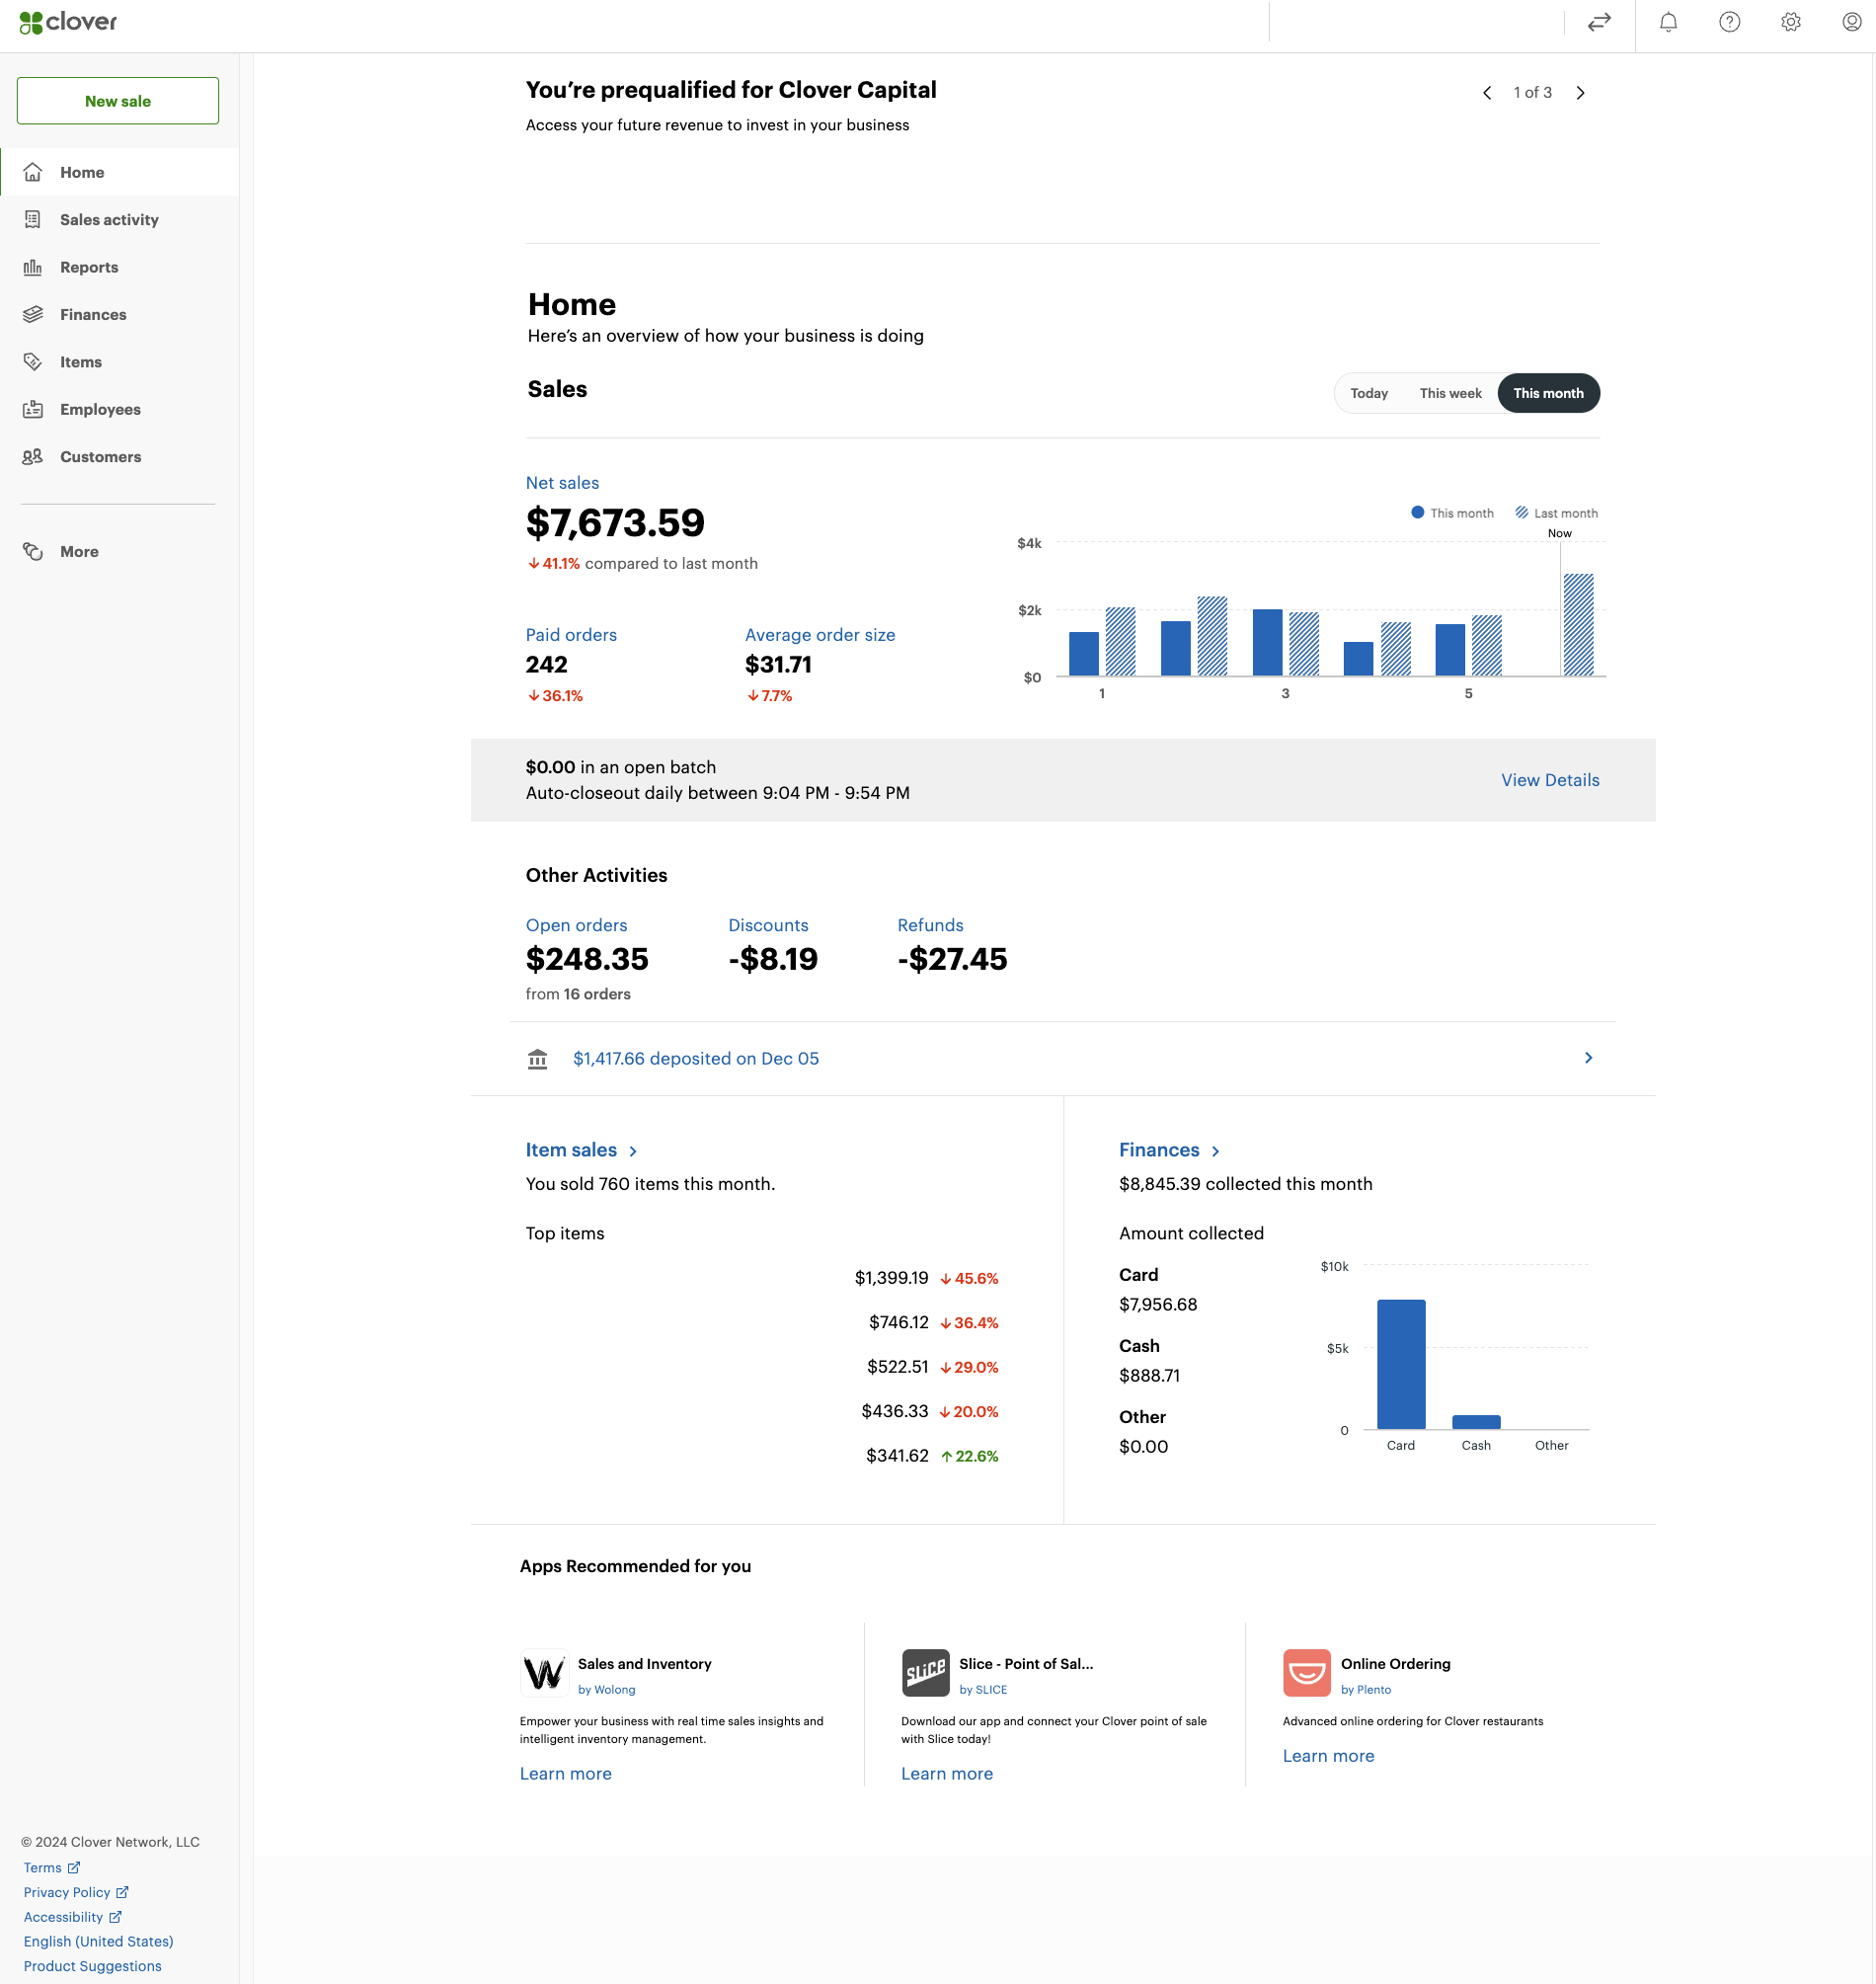
The Clover Dashboard serves as your central hub for managing various aspects of your business. Here are the essential components to familiarize yourself with:
Home Screen Overview: Upon logging in, you will be greeted by the home screen. This section provides a snapshot of your daily sales, pending orders, and customer interactions.
Navigation Menu: Located on the left side of the dashboard, the navigation menu allows you to access different functionalities such as Orders, Customers, Inventory, and Reports.
Orders Section: This area lets you view current and past orders. You can filter orders by date, status, or customer, making it easy to keep track of transactions.
Customer Management: Here, you can add new customers, view their purchase history, and manage customer profiles. This feature is essential for building customer relationships and providing tailored services.
Inventory Management: Track your products and stock levels. You can update inventory counts, categorize items, and manage suppliers from this section.
Reports Tab: For performance analysis, the Reports tab provides detailed insights into sales, customer behavior, and inventory trends. You can customize the date range and specific metrics to suit your reporting needs.
Settings: The settings menu allows you to configure your account preferences, payment methods, and notification settings, ensuring the dashboard aligns with your business needs.
By mastering these components of the Clover Dashboard, you can enhance your operational efficiency and improve customer satisfaction.